 Anoduck's Das Wiki
- Das Wiki
- zsh.md
- zoneminder.md
- yubikey.md
- yasnippet.md
- xprofile.md
- xmonad.md
- wpa_supplicant.md
- wp3.md
- windows.md
Menu (Edit):
Link List (Edit):
#  _   _               _
# | | | | __ _ _ __ __| |_      ____ _ _ __ ___
# | |_| |/ _` | '__/ _` \ \ /\ / / _` | '__/ _ \
# |  _  | (_| | | | (_| |\ V  V / (_| | | |  __/
# |_| |_|\__,_|_|  \__,_| \_/\_/ \__,_|_|  \___|
#
Computer Hardware Repair
At some point in your life, a computer will break, and your going to want to fix it. If you are not lazy, you can actually accomplish more than you think, and once you have gone through the steps a couple of times, it is just like riding a bicycle.
Another added benefit is you can pick up used computers quite easily, and fix them in a matter of seconds. People are always throwing things away rather than fixing them. You can collect quite a lot of computers this way, and have them running by simply reaching inside the case and unplugging a wire.
Before you begin
Follow the steps repeated constantly in the BBC sitcom “The I.T. Crowd”, and I quote.
Have you tried turning it on and off again?
Is the button on the side glowing?
Does it make any noise?
Have you tried to see if it is even plugged in?
Have you checked the monitor to see if that is plugged in?
Next you can try these.
Not that this set of instructions are exhaustive in any manner, they are just some helpful tips learned with experience and sometimes the hard way. They are placed here for the embetterment of mankind, that other’s may recieve the chance to learn from another’s previous mistakes and experiences.
Let the capacitors drain
Next, power it off, disconnect the power cable, and let it sit there for thirty minutes disconnected. Computers have capacitors that store electricity, it takes time for them to drain out. After thirty minutes has passed, replug in the power cable and try to boot it up again. Sometimes this works, and when it does you will be so thankful.
See if you can get it to beep.
It is important to keep in mind that this tip is deprecated, and was deprecated well before our time arrived. Not all modern computers come with a chirp speaker installed on their motherboard, this is rather old hat stuff. If you are fortunate to see one installed on your board than give it a whirl.
Disconnect all external cables, unplug all usb devices, disconnect all the hardrive cables, leaving only the power cables attached, and see if it beeps when powered on. If it does, you are having more fortune than I have had in my experience. This means your mobo is looking for peripherals and can’t find then. This is a good sign.
Chirp codes
Although a thing of the past, as a means of providing diagnostic information to a computer repair technician, performing the above step would place the motherboard in diagnostic mode, and the motherboard would output a chirp code. The chirp code could then later be looked up and would provide information that could be used to resolve the problem. Admittedly we have never experienced this.
Check the power supply
Once the basic diagnostics have been performed, it is best to checkout the power supply, because the power supply has the highest probability of failure. You can purchase power supply testing equipment rather cheaply, or you can use a multimeter and test the individual connections for the correct voltage. Use a search engine to look up more information on how to do this.
Pop out the battery
Looking at a motherboard, it is quite easy to see there is a coin shaped battery, usually of the common size of “2032”. Use your finger, a flathead screwdriver, or a pocket knife to depress the release and then pop it out of it’s holder. When these little batteries go bad, they can generate all sorts of problems The purpose of this battery is to keep enough power going to the bios memory to sustain clock operability between boots, and your computer will operate without one just fine, but you will have to set your clock everytime you boot into it, so it is best to keep a fresh one installed.
The Hail Mary
Keep in mind, a somepoint in the troubleshooting process you will need to check to see if there is a short in the actual case itself. At what point in the process you choose to do this is your choice, but it does need to be done. You do this by removing the mobo and power supply from the casing, set it on a table, and use a jumper or paperclip to jump off the power switch. If it boots without a problem, you will probably need to get a new case, or you can make one out of legos.
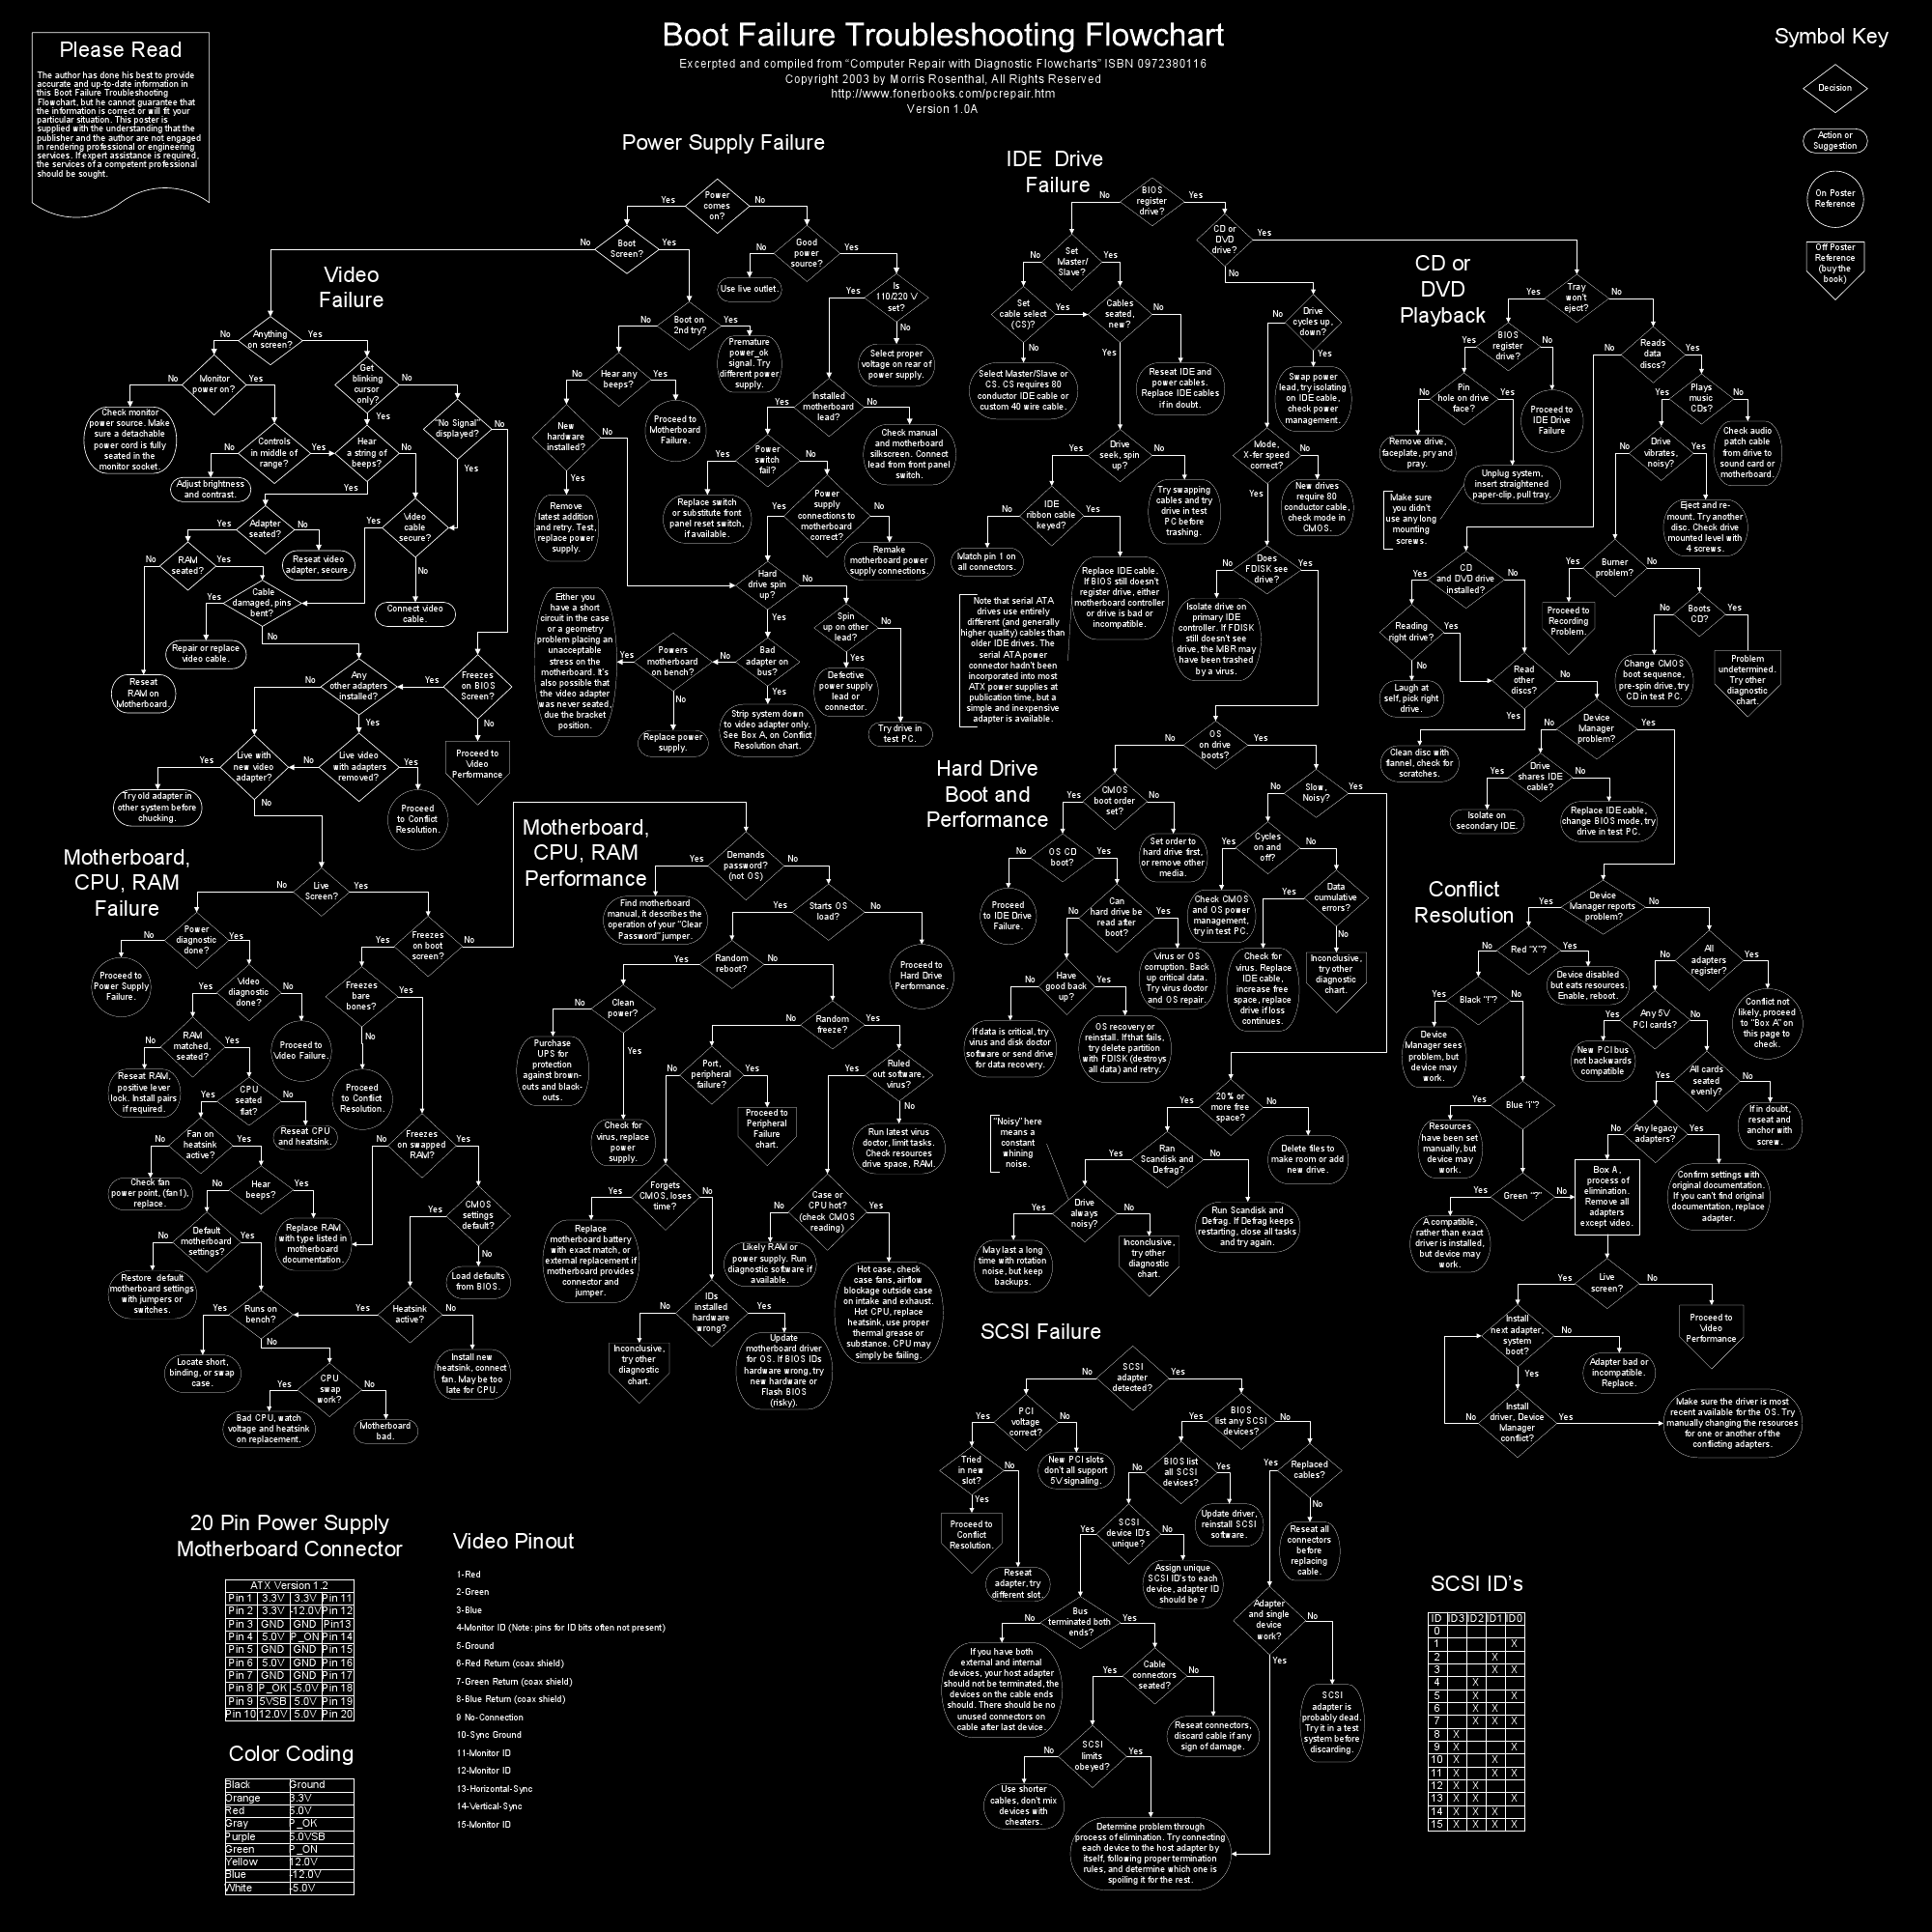
Your handy troubleshooting chart.